Severe bleeding from traumatic injuries is the leading cause of preventable death in both combat and civilian trauma scenarios. Compressed gauze provides a compact, portable, and highly effective solution for controlling hemorrhage through wound packing — a technique that applies direct pressure deep within wounds to stop arterial and venous bleeding.
This guide covers what compressed gauze is, when to use it, the correct 8-step wound packing protocol, the most common application errors, and how to build a kit around it. Wound packing is a learnable skill. Done correctly, it keeps someone alive until EMS arrives. Done poorly, it gives a false sense of control while the patient continues bleeding.
What is compressed gauze?
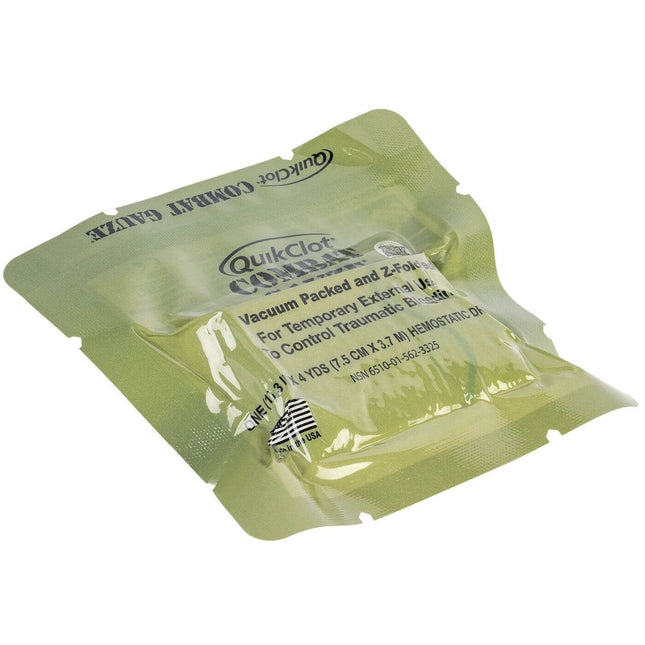
Compressed gauze — also called z-fold gauze or vacuum-packed gauze — is sterile medical gauze tightly compressed into a compact package. When removed from packaging, it expands to several feet of continuous gauze strip.
Key characteristics: compact and portable (80–90% volume reduction makes it IFAK-ready); sterile individual packaging; continuous 3–5 yard strip that allows deep wound packing without multiple pieces; high absorbency; and radiopaque markers in many products so medical professionals can locate gauze if accidentally left in a wound.
Why compressed gauze is essential for hemorrhage control
Unlike surface dressings, compressed gauze can be packed deep into wound cavities to apply direct pressure at the bleeding source — which is the only way to control arterial hemorrhage in a penetrating wound. It works for gunshot wounds, stab wounds, deep lacerations, traumatic amputations, and blast injuries. It deploys fast, takes up minimal space, and costs significantly less than specialized hemostatic dressings while covering most field scenarios where gauze packing is indicated.
When to use compressed gauze — and when not to
Primary indications
- Deep penetrating wounds — gunshot, stab, or impalement injuries creating cavities that require internal pressure
- Junctional hemorrhage — bleeding from areas where tourniquets cannot be applied (groin, armpit, neck, torso)
- Severe lacerations — deep cuts with active bleeding that direct pressure alone cannot control
- Traumatic amputations — partial or mangled extremities with complex bleeding requiring both packing and tourniquet
- Blast injuries — fragmentation wounds with multiple entry points and irregular wound channels
When wound packing is NOT appropriate
- Superficial wounds controlled by direct pressure alone
- Chest wounds with potential pneumothorax — use chest seals instead
- Abdominal evisceration — cover with moist dressing, do not pack
- Eye injuries
- Suspected skull fractures or brain injuries
Wound packing technique: 8-step protocol
Step 1: Ensure scene safety and PPE
- Assess for ongoing threats before approaching
- Gloves on (nitrile or latex) for bloodborne pathogen protection
- Eye protection if available — blood can spray under pressure
- Direct someone to call 911 or call yourself if alone
Step 2: Expose and assess the wound
- Remove or cut away clothing to fully visualize the injury
- Quickly assess wound depth, size, and bleeding severity
- Identify if wound is packable (deep cavity) or requires surface pressure only
- Look for multiple entry and exit wounds
Step 3: Apply initial direct pressure
- Place gloved hand or gauze pad directly on wound
- Apply firm, continuous pressure for 30–60 seconds
- If bleeding slows significantly, continue pressure without packing
- If bleeding continues, proceed to wound packing
Step 4: Prepare compressed gauze
- Open the package (tear or cut open)
- Remove gauze while maintaining sterility — don't touch the gauze itself with ungloved hands
- Allow gauze to partially expand
- Identify the leading end for insertion
Step 5: Pack the wound
Push gauze to the bottom of the wound cavity using fingers or a gloved hand. Pack tightly — use firm pressure to compress gauze into the wound; it should feel tight and resistant. Fill the wound completely, packing in layers or accordion pattern for deep wounds. Leave 6–12 inches of gauze tail exposed outside the wound for medical removal. Wound packing should be uncomfortable for the patient — this indicates adequate pressure. Loose packing does not stop bleeding.
Step 6: Apply direct pressure over the packed wound
- Place additional gauze pad over the packed wound
- Apply firm, continuous pressure directly over the wound for minimum 3 minutes
- Use your full body weight if necessary — lean into it
- Do NOT lift pressure to check if bleeding stopped — maintain continuous pressure throughout
- If bleeding soaks through, add more gauze on top and increase pressure. Do not remove original packing.
Step 7: Secure the dressing
- Once bleeding is controlled, secure dressing with pressure bandage or conforming gauze wrap
- Wrap firmly to maintain pressure on the wound
- Verify wrapping does not cut off circulation to the limb
- Monitor for continued bleeding through the dressing
Step 8: Monitor and treat for shock
- Continuously monitor patient's condition and level of consciousness
- Keep patient warm — hypothermia accelerates coagulopathy
- Elevate legs if no spinal injury suspected
- Do NOT remove packed gauze — only medical professionals should remove it
- Prepare for rapid evacuation to a medical facility
Common wound packing mistakes to avoid
Packing too loosely. The most common error. Gauze must be packed tightly with significant force to compress blood vessels. Loose packing is ineffective and gives false confidence that the wound is being addressed.
Not packing deep enough. Gauze must reach the bottom of the wound cavity where bleeding originates. Surface packing does not control deep hemorrhage.
Insufficient pressure after packing. Packing alone is not enough. Firm pressure over the packed wound for at least 3 minutes is required for hemostasis.
Checking too soon. Lifting pressure to see if it worked disrupts clot formation. Maintain continuous pressure for at least 3 minutes before assessing.
Removing packed gauze in the field. Removal can restart bleeding. Only medical professionals in controlled settings should remove packed gauze.
Using non-sterile materials. Infection risk is secondary to bleeding control in the immediate term — but sterile gauze reduces downstream complications. Always use sterile compressed gauze when available.
Compressed gauze vs. hemostatic gauze
Standard compressed gauze works by physical pressure and absorption. It's affordable, widely available, and effective for most field scenarios. Hemostatic gauze — QuikClot Combat Gauze, ChitoGauze, Celox Gauze — adds a clotting agent (kaolin or chitosan) that accelerates coagulation. Hemostatic gauze produces faster hemostasis on severe arterial bleeds and is the CoTCCC-preferred option for life-threatening hemorrhage.
Both types require identical wound packing technique. The hemostatic agent enhances the outcome but does not replace correct application. For kits requiring CoTCCC-aligned performance: the QuikClot Combat Gauze Z-Fold and the QuikClot EMS 4x4 Dressing are the options with documented clinical efficacy.
Hemorrhage control across environments
Wilderness and remote areas. Compressed gauze is essential for backcountry emergencies where evacuation takes hours. Compact packaging fits in hiking first aid kits without bulk.
Workplace safety. High-risk industries — construction, manufacturing, logging, mining — should stock compressed gauze at first aid stations for traumatic injury response.
Tactical and law enforcement. Essential component of IFAKs for officers and tactical teams who may face penetrating trauma from firearms or edged weapons.
Vehicle emergency kits. Motor vehicle accidents produce severe traumatic injuries. Compressed gauze staged in the vehicle enables immediate hemorrhage control before EMS arrives.
Home preparedness. Power tools, kitchen knives, and other sharp objects can produce wounds requiring packing. A kit on the shelf is only useful if it's accessible.
Training and skill development
Wound packing technique requires hands-on training — reading about it is not the same as doing it under simulated stress. Recommended courses: Stop the Bleed (free, community-level hemorrhage control), TCCC (military-standard trauma training), Wilderness First Responder (includes wound packing for remote settings), and EMT/Paramedic certification programs.
Practice with actual compressed gauze to understand the handling, expansion, and packing pressure required. Simulate time-pressure scenarios. Refresh skills every 6–12 months — motor skills under stress degrade without rehearsal.
Building your hemorrhage control kit
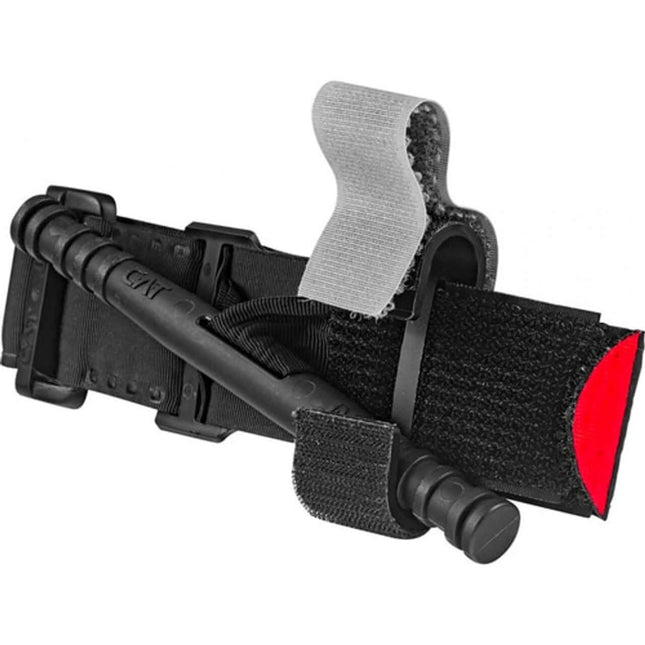
Compressed gauze works with the rest of a complete hemorrhage control kit. Minimum recommended contents: 2–3 rolls of compressed gauze; a CoTCCC-approved tourniquet (CAT Gen 7 or SOFTT-W) for limb hemorrhage; a pressure dressing (Israeli bandage or equivalent); vented chest seals for penetrating chest wounds; hemostatic gauze for severe arterial bleeds; multiple pairs of nitrile gloves; trauma shears; and a permanent marker for noting tourniquet application time.
ViTAC's professional IFAKs include these components in purpose-built configurations alongside hemostatic supplies and tourniquets.
When to seek immediate medical care
Wound packing is a temporary measure. Every wound that requires packing requires professional medical evaluation. Deep penetrating wounds frequently have internal injuries not visible externally. Risk of infection increases with time. Packed gauze must be professionally removed and the wound properly closed. Blood loss may require transfusion even if surface bleeding is controlled.
Call 911 immediately when applying wound packing. Continue hemorrhage control while waiting for EMS — don't stop pressure to make the call.
Wound packing with compressed gauze keeps people alive in the window between injury and definitive care. The technique is teachable. The equipment is accessible. The failure modes — packing too loosely, not going deep enough, lifting pressure too soon — are avoidable with training. Get the right gauze, learn the protocol, and stage the kit where you'll actually reach it when it counts.