Trusted by Law Enforcement & Tactical Professionals
Tourniquet Application: Complete Guide to Using a CAT Tourniquet to Stop Severe Bleeding
9 min reading time
Learn proper CAT tourniquet application step-by-step: placement, windlass technique, common mistakes, and when to use this hemorrhage control standard.
Tourniquet Application: The Life-Saving Skill Everyone Should Master
Tourniquet application is one of the most critical emergency medical skills you can learn. In high-stakes situations—whether at home, on the road, in the workplace, or during outdoor activities—severe bleeding from limb injuries is one of the fastest ways a life can be lost. When every second counts, knowing how to properly apply a tourniquet can mean the difference between survival and tragedy.
The Combat Application Tourniquet (CAT) is the gold standard in hemorrhage control. Field-tested by military medics, trusted by law enforcement, and recommended by the American College of Surgeons' Stop the Bleed® program, the CAT tourniquet is designed for rapid, one-handed application in the most demanding circumstances.
This comprehensive guide covers everything you need to know about tourniquet application: proper technique, step-by-step protocols, common mistakes to avoid, when to use a tourniquet, and why this tool belongs in every serious IFAK and emergency preparedness plan.
Why Tourniquet Application Skills Matter: The Sobering Statistics
Understanding the urgency of hemorrhage control starts with recognizing how quickly severe bleeding can become fatal.
The Five-Minute Window
Massive bleeding from a limb injury can cause death in under five minutes—often before emergency medical services even arrive on scene. This isn't theoretical—it's documented medical fact.
According to the American College of Surgeons, a person with severe arterial hemorrhage can bleed out in as little as 3–5 minutes. [Source: Stop the Bleed]
Preventable Deaths
Uncontrolled bleeding is the leading cause of preventable death in trauma. A 2020 study published in the Journal of Trauma and Acute Care Surgery found that 20% of trauma deaths were potentially survivable with immediate bleeding control interventions—like proper tourniquet application. [Source]
You Are the First Responder
In the critical minutes before professional help arrives, you are the first responder. Whether the incident happens at work, during your commute, at home, or on the trail, your ability to stop severe bleeding can save a life.
This makes tourniquet application training not just valuable—it's essential for anyone committed to emergency preparedness.
Understanding the CAT Tourniquet: Design and Function
The Combat Application Tourniquet (CAT) has become the most widely used tourniquet in both military and civilian settings due to its proven effectiveness and ease of use.
Key Design Features
Windlass System
The rotating rod (windlass) allows you to tighten the tourniquet until arterial blood flow stops. This mechanical advantage enables sufficient pressure even with one hand.
Self-Adhering Band
The friction adapter buckle and Velcro strap secure the tourniquet around the limb quickly without requiring knots or complex fastening.
Retention Clip
Once tightened, the windlass locks into a retention clip that prevents it from unwinding, maintaining constant pressure.
Time Strip
A white area on the tourniquet allows you to write the application time—critical information for medical professionals.
One-Handed Operation
The CAT can be self-applied with one hand, essential when you're the injured person or when treating multiple casualties.
When to Use a Tourniquet: Indications for Application
Proper tourniquet application requires understanding when this intervention is appropriate.
Primary Indications
Apply a tourniquet when:
Severe bleeding from a limb that cannot be controlled with direct pressure
Arterial bleeding (bright red, spurting blood)
Multiple casualties requiring rapid hemorrhage control
Unsafe environment where prolonged direct pressure isn't feasible
Partial or complete amputation of a limb
Crush injuries with significant vascular damage
When NOT to Use a Tourniquet
Tourniquets are NOT appropriate for:
Bleeding from the torso, neck, or head (use wound packing and pressure instead)
Minor bleeding controlled by direct pressure
Venous bleeding easily managed with pressure dressings
Snake bites (tourniquets can worsen tissue damage)
Step-by-Step Tourniquet Application Protocol
Follow this systematic approach for proper CAT tourniquet application:
Step 1: Ensure Scene Safety
Before approaching the injured person:
Assess for ongoing threats (traffic, violence, environmental hazards)
Put on gloves if available (bloodborne pathogen protection)
Call 911 or direct someone else to call
Step 2: Identify the Bleeding Site
Quickly assess the injury:
Confirm bleeding is from a limb (arm or leg)
Determine severity (arterial vs. venous bleeding)
Apply direct pressure while preparing the tourniquet
Step 3: Position the Tourniquet Correctly
Proper placement is critical for effectiveness:
Ideal Placement:
Place 2–3 inches above the wound (between wound and heart)
Position on bare skin when possible (remove or cut away clothing)
Never place directly over joints (elbows, knees)
If wound location is unclear or multiple wounds exist, apply "high and tight" on the limb
For Arms: Apply to upper arm between shoulder and elbow For Legs: Apply to thigh between hip and knee
Step 4: Secure the Tourniquet Band
Thread and tighten the strap:
Route the band through the friction adapter buckle
Pull the strap tight around the limb
Secure with the Velcro fastener
Ensure the band is snug but not yet stopping blood flow
Step 5: Tighten with the Windlass
This is the critical step that stops bleeding:
Twist the windlass rod clockwise (or counterclockwise—either works)
Continue twisting until the bleeding completely stops
Check distal pulse—it should be absent (no pulse = effective application)
If bleeding continues, tighten more
Important: Don't stop tightening just because it seems tight. The tourniquet must completely occlude arterial blood flow.
Step 6: Secure the Windlass Rod
Lock the tourniquet to maintain pressure:
Insert the windlass rod into the retention clip
Secure the windlass strap over the rod and clip
Fasten the Velcro to prevent the rod from unwinding
Double-check that the windlass cannot rotate
Step 7: Mark the Application Time
Document when the tourniquet was applied:
Write the time directly on the white time strip using permanent marker
If no marker available, write on the person's forehead or clothing
Use "T" followed by the time (e.g., "T 14:35")
This information is critical for medical teams to prevent complications
Step 8: Monitor and Reassess
After application:
Continuously monitor the patient's condition
Treat for shock (keep warm, elevate legs if no spinal injury)
Do NOT loosen or remove the tourniquet
If bleeding continues, apply a second tourniquet above the first
Provide reassurance and keep the person calm
Common Tourniquet Application Mistakes to Avoid
Even with the right equipment, incorrect technique can reduce effectiveness or cause complications. Avoid these critical errors:
✘ Placing Too Far from the Wound
Positioning the tourniquet too high reduces effectiveness and increases tissue damage. Place 2–3 inches above the wound, not at the top of the limb unless necessary.
✘ Applying Over Clothing
Thick clothing reduces pressure and effectiveness. Always apply to bare skin when possible. Cut away clothing if needed.
✘ Positioning Over Joints
Tourniquets placed over elbows or knees cannot generate sufficient pressure. Always position on the long bone above the joint.
✘ Not Tightening Enough
The most common mistake. If bleeding hasn't completely stopped, the tourniquet isn't tight enough. Keep twisting the windlass until all bleeding ceases.
✘ Loosening Before EMS Arrives
Never loosen or remove a tourniquet once applied. This can cause fatal re-bleeding and shock. Only medical professionals should remove tourniquets.
✘ Failing to Mark Time
Not documenting application time can lead to complications. Medical teams need this information to manage potential tissue damage.
✘ Using Improvised Tourniquets
Belts, ropes, and other improvised devices rarely generate sufficient pressure and can cause additional injury. Always use a proper tourniquet like the CAT.
Tourniquet application is a high-stakes skill. Practice regularly with training tourniquets before you ever need to use one in a real emergency.
Why CAT Tourniquets Belong in Every Emergency Kit
Severe bleeding emergencies don't only happen on battlefields or in wilderness areas. They occur in everyday settings:
Vehicle accidents with traumatic injuries
Workplace incidents involving machinery or power tools
Home accidents with sharp objects or equipment
Outdoor activities where help is far away
Active threat situations requiring rapid hemorrhage control
Mass casualty incidents where EMS is overwhelmed
Where to Keep CAT Tourniquets
Every prepared individual should have CAT tourniquets in multiple locations:
Vehicle emergency kits (keep in passenger compartment, not trunk)
Home trauma stations (easily accessible, not buried in cabinets)
Range bags and EDC setups for firearms enthusiasts
Workplace first aid kits (especially industrial settings)
Outdoor adventure packs for hiking, hunting, camping
Individual First Aid Kits (IFAKs) for tactical professionals
ViTAC Solutions: Equipping You for Life-Saving Response
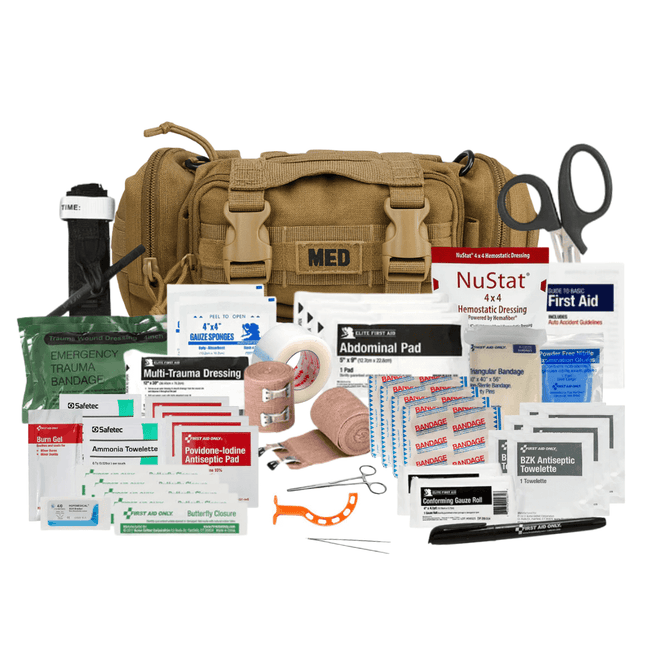
At ViTAC Solutions, we don't believe in average kits or inadequate supplies. We build mission-ready trauma systems tested by U.S. Army Green Berets and designed for real-world emergencies.
Our IFAKs include genuine CAT Gen 7 tourniquets, advanced hemostatic supplies, and professional-grade equipment that performs when failure is not an option.
Explore ViTAC's trauma-grade first aid kits and equip yourself to lead when lives are on the line.
Knowing how to properly apply a tourniquet isn't a luxury—it's a life-saving skill that every prepared individual should master. When seconds matter and severe bleeding threatens a life, you won't have time to Google instructions or watch YouTube videos.
Train now. Gear up with the right tools. Be the one who's ready to act when it matters most.
Because in those critical minutes before help arrives, you are the difference between tragedy and survival.
ViTAC Solutions – Professional-grade trauma equipment built by veterans, trusted by those who refuse to leave preparedness to chance. Because when bleeding won't stop, proper tourniquet application saves lives.
In Stock
Domestic Shipping (USA - Lower 48 Only) Orders are processed within 24 hours and typically ship within 1–2 business days. Once shipped, delivery takes an estimated 3–7 days, with most orders arriving in just 5 days. Please Note: We currently do not ship to Alaska, Hawaii, or international destinations. Questions? Contact us anytime at support@vitacsolutions.com or call 307-202-8426.
What are you preparing for? On-duty response, family preparedness, outdoor adventure... Answer 5 quick questions and we'll match you with the right gear.
Cold environments demand deliberate gear decisions. This guide covers the three-layer system — base, mid, and shell — from a preparedness standpoint: how each layer...
Identify Fake Gear: Ensuring Your Trauma Kits Meet TCCC Standards
Counterfeit CAT tourniquets fail under pressure. TCCC-standard gear has specific markings, materials, and testing — here's how to verify before your kit is tested for...
Uncontrolled bleeding is the leading cause of preventable trauma death. EMS averages 14 minutes nationally. A firearm stops the threat — only a trauma kit...
We've been downrange. We know what it costs to be unprepared. ViTAC was built by U.S. Army Special Operations veterans to make sure the people who run toward the threat — and the families who depend on them — have gear that works when everything is on the line.
— ViTAC Solutions Founders | 40+ years combined Special Operations experience
Most of our trauma kits and first aid supplies qualify for HSA and FSA reimbursement. Don't let your benefits expire — invest them in gear that could save a life.
The item was as promised. Everything in the kit was high-quality and I’m pleased with that. The only problem I have is I’m not sure it’s worth the cost. I found all of the contents individually for significantly less money. The only thing I didn’t find on my own was the pouch everything came in and that was a perfect fit so I would give it an A plus on quality, but a C on value.