Car Trauma Kit Essentials for Bleeding Control
11 min reading time
11 min reading time
Massive arterial bleeding can cause unconsciousness in under three minutes. Average EMS response time in most areas is eight to twelve minutes. That gap is the reason a properly stocked car trauma kit isn't optional — it's the difference between a survivor and a fatality.
Most vehicles carry a gas station first aid kit loaded with Band-Aids and antiseptic wipes. That kit is useless after a serious crash. Deep lacerations, crush injuries, penetrating chest wounds, and partial amputations don't care about your butterfly bandages. What stops them is a tourniquet, hemostatic gauze, and someone trained to use them.
Every item in this kit requires hands-on training to use correctly under stress. Stop the Bleed certification takes two hours, is offered free nationwide, and will make the difference between action and hesitation when it counts. No kit replaces trained hands.
Vehicle crashes produce a specific class of injuries: high-force, high-velocity trauma that tears blood vessels. A single femoral artery injury can cause unconsciousness in under two minutes. That's not a worst-case scenario — that's physics.
The injuries that kill people at crash scenes are predictable:
None of these are treated by the kit in your glove box. All of them are treatable in the first three minutes with the right tools and training.
Generic first aid kits are built for workplace cuts and minor burns. They are not built for trauma. If your car kit doesn't have a tourniquet, hemostatic gauze, and a chest seal, it won't stop anyone from dying at a crash scene.
This is not a comprehensive medical bag. A car trauma kit has one mission: stop life-threatening hemorrhage and stabilize until EMS arrives. Every item below earns its place.
| Item | Recommended Spec | Qty |
|---|---|---|
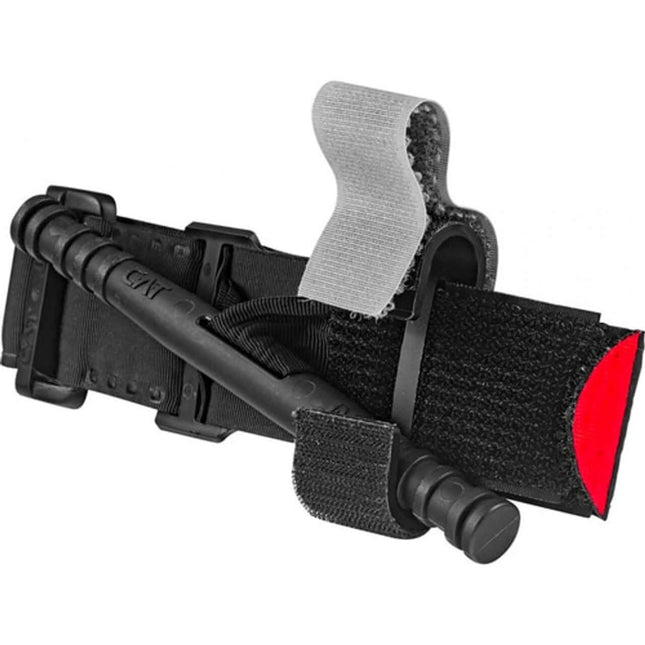
| Tourniquet | CAT or SOF-T Wide (CoTCCC-approved) | 2 |
| Backup tourniquet | SWAT-T elastic band | 1 |
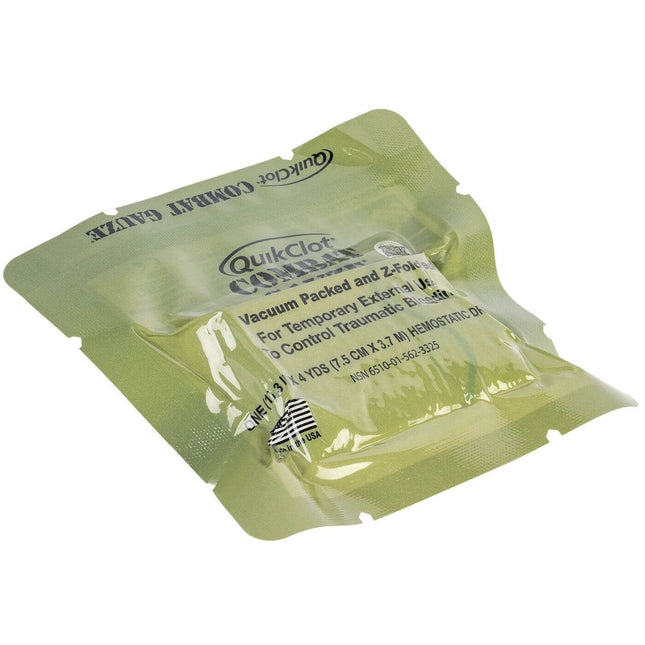
| Hemostatic gauze | QuikClot or Celox-style | 1–2 rolls |
| Pressure dressing | Israeli-style (6" or 4") | 2 |
| Chest seals | Vented + non-vented (paired) | 2 pairs |
| Nitrile gloves | Heavy-duty, correct fit | 2+ pairs |
| Trauma shears | Spring-loaded, 7.25" | 1 |
| Nasopharyngeal airway | 28 FR and 32 FR | 1 each |
| Thermal blanket | Emergency foil, reusable grade | 1 |
| CPR barrier | Pocket mask with one-way valve | 1 |
When you're on scene, execution needs to be automatic. Learn these three sequences until they're reflex.
1. TOURNIQUET APPLICATION
Place two to three inches above the wound. Avoid joints. Tighten the windlass until bleeding stops — not until it slows, until it stops. Write the application time directly on the strap or the patient's skin. Do not remove it. Do not loosen it. If bleeding continues after a properly applied tourniquet, apply a second tourniquet above the first and hold direct pressure.

2. WOUND PACKING WITH HEMOSTATIC GAUZE
Pack the wound cavity tightly — contact with the bleeding source is everything. Apply firm, sustained pressure for a full three minutes. Don't check the wound by pulling gauze. Bind with a pressure dressing and hold until EMS takes over. Peeking defeats the purpose.
3. CHEST SEAL APPLICATION
Clear blood and clothing from around the wound. Press the seal firmly around all edges — airtight, no gaps. Watch for breathing changes and altered consciousness. Vented seals are preferred for field use. Needle decompression is for trained rescuers only. Your job is seal and monitor.
Before anything else: make the scene safe, put on gloves, call 911, then expose and address the injury. Do not move a patient unless the scene is actively dangerous. Record tourniquet time. Give a clear handover to EMS when they arrive.
Match the kit to the realistic threat. Overbuilding wastes money. Underbuilding gets people killed.
| Profile | What You Need | Estimated Cost |
|---|---|---|
| Daily commuter | 1 tourniquet, hemostatic gauze, chest seal, gloves | $50–$80 |
| Family road trips | 2 tourniquets, extra dressings, thermal blanket, pediatric supplies | $100–$150 |
| Off-road / overlanding | Responder pouch, high item counts, waterproof mounting | $150–$250 |
| Fleet vehicles | Standardized mid-level kit + driver training program | $100–$200 per vehicle |
| LEO / first responder | Full patrol pack, redundancies, durable weatherproof case | $200–$800 |
ViTAC's customizable vehicle kits are a practical midpoint — vetted, ready-to-go packs you can configure to match your driving profile. GovX discounts available for eligible buyers, 30-day satisfaction guarantee.

The best car trauma kit is the one you can access in under five seconds while your hands are shaking. Fastest to slowest access:
Hard-shell polycarbonate cases resist crush and heat better than soft bags. Look for high-visibility color, quick-release straps or pull handles, and drainage to prevent trapped moisture. Soft sealed bags trap heat against adhesives and chest seal packaging — avoid them for primary placement in a hot vehicle.
Quarterly: visual check of seals, straps, and expiration dates. Annual: full audit, replace expiring items. After any use: replace immediately. Hemostatic dressings and sterile gloves: 2–5 years. Tourniquets: 5–10 years. Running an expired kit is the same as running no kit.
What's the difference between a car trauma kit and a standard first aid kit?
A standard first aid kit addresses minor injuries — cuts, burns, blisters. A car trauma kit is built to stop life-threatening hemorrhage from crash injuries. The tools are completely different and not interchangeable.
Can I use a tourniquet without training?
You can apply one — but training significantly improves correct placement, tightness, and timing under stress. An improperly applied tourniquet can fail or cause nerve damage. Stop the Bleed certification takes two hours and is free. Get it before you need it.
How often do I need to replace kit contents?
Inspect quarterly. Hemostatic dressings and sterile gloves last 2–5 years. Tourniquets are rated 5–10 years with proper storage. Replace anything after use or if visibly damaged. Running an expired kit is the same as running no kit.
Where should I mount the kit in my vehicle?
Under the driver's seat or on the headrest is fastest. Center console works for most sedans. Avoid the trunk as your primary location — after a rear-impact crash it may be inaccessible. Pick a spot you can reach with one hand while seated.
Do I need a vented or non-vented chest seal?
Carry both. Vented seals are preferred for most field use because they reduce tension pneumothorax risk. Non-vented seals are the backup. Stock one of each, minimum.
A car trauma kit isn't preparedness theater — it's a commitment to acting when seconds count. Build it around one mission: stop life-threatening bleeding. Get a CoTCCC-approved tourniquet, hemostatic gauze, and chest seals. Mount the kit where you can reach it in under five seconds. Then train until the steps are automatic. Gear without training is just weight. Training without gear is just knowledge. You need both.
Browse ViTAC's vehicle trauma kits — built for professionals, configurable for every mission profile.

OSHA minimum workplace kits don't include a tourniquet. Here's how to calculate station count, stock each station, and build bleed control coverage in any public...

One kit at the main entrance fails the 90-second coverage rule for most buildings. Here's how to run a coverage audit and calculate the correct...

Arterial hemorrhage kills in 3 minutes. Urban EMS takes 7–10. Every business needs CoTCCC-standard bleed control kits — here's how to select, deploy, and train...

40+ states mandate bleed control kits in schools — but most deployment plans miss classrooms and buses. Here's the placement standard that actually works.

Most of our trauma kits and first aid supplies qualify for HSA and FSA reimbursement. Don't let your benefits expire — invest them in gear that could save a life.


$124.95


$279.99

$37.49 - $139.46


$299.95 $269.95


$139.95 - $169.95

$49.95


$25.99


$164.95

We've been downrange. We know what it costs to be unprepared. ViTAC was built by U.S. Army Special Operations veterans to make sure the people who run toward the threat — and the families who depend on them — have gear that works when everything is on the line.
— ViTAC Solutions Founders | 40+ years combined Special Operations experience