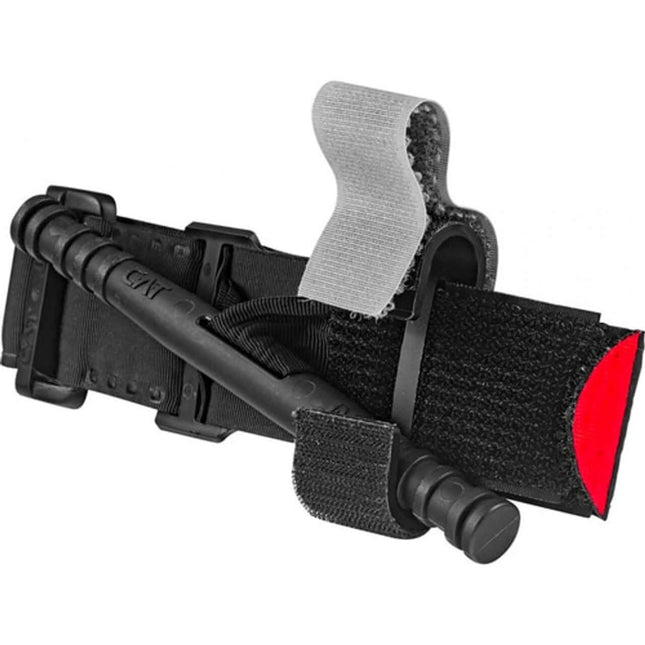
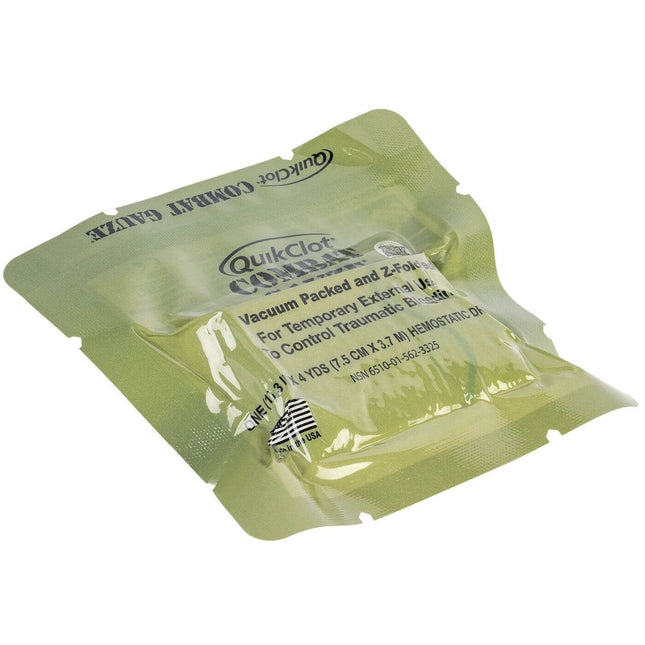
Severe arterial bleeding kills in 3 to 5 minutes per TCCC Guidelines — faster when the injury involves a proximal extremity. National EMS response averages 14 minutes per NHTSA data, and in rural areas that window exceeds 30 minutes. The tourniquet in your kit is what closes that gap. Whether it closes the gap completely depends on whether you can apply it correctly under pressure, without thinking through the steps.
The CAT Gen 7 — Combat Application Tourniquet — has over 4,000 documented combat applications since 2005. With correct technique, the documented survival rate for severe limb bleeding exceeds 87%. That number drops when application is wrong: tourniquet placed too low, windlass not tightened to arterial occlusion, or no tourniquet at all because the carrier didn't train with what they're carrying.
This guide covers the CAT's design, when to use it, the step-by-step protocol, and the mistakes that cost lives.
The CAT design — what each component does
The CAT isn't complex. It has five functional components, and each one exists for a specific reason under field conditions:
- Windlass system — the rotating rod that generates mechanical advantage sufficient to occlude arterial blood flow with one hand. No simple elastic wrap or belt produces equivalent pressure.
- Self-adhering band with friction adapter buckle — secures around the limb without knots or complex fastening. Designed for one-handed application when the other arm is injured.
- Retention clip — locks the windlass rod after tightening so pressure is maintained without holding the rod in place.
- White time strip — accepts permanent marker. Application time written here is the first thing EMS and trauma surgeons look for. Don't skip it.
- One-handed operation — the CAT can be self-applied. That's a design requirement, not a convenience feature.
When to apply a tourniquet
Apply the CAT when the bleed is on a limb and cannot be controlled by direct pressure alone. Specific indications:
- Arterial bleeding from an arm or leg — bright red, spurting blood
- Severe venous bleeding that doesn't slow under sustained direct pressure
- Partial or complete traumatic amputation
- Crush injury with significant vascular damage
- Mass casualty situation requiring rapid hemorrhage control across multiple patients
- Tactically unsafe environment where sustained direct pressure isn't feasible
Tourniquets are not appropriate for torso, neck, or head bleeding — those wounds require hemostatic gauze packed under direct pressure. They're also not appropriate for snake bites, where compression can worsen tissue damage.
Step-by-step application protocol
Eight steps. No variation. The sequence is built around what kills fastest and what the windlass mechanism requires to function correctly.
- Confirm scene safety and call for EMS. If someone else is present, direct them to call 911 before you touch the patient. You are the first responder — that role ends the moment EMS arrives.
- Identify the bleed and confirm it's on a limb. Arterial blood is bright red, often spurting in rhythm with the heartbeat. Apply direct pressure while you prepare the tourniquet.
- Place the tourniquet 2 to 3 inches above the wound. Position it between the injury and the heart. Never place it directly over a joint — elbows and knees don't allow sufficient pressure. For uncertain wound location or multiple wounds, apply high and tight: upper arm or upper thigh.
- Route the band and secure with Velcro. Thread through the friction adapter buckle, pull tight around the limb, and lock with the self-adhering strap. The band should be snug but not yet stopping blood flow.
- Tighten the windlass until bleeding stops. Twist the rod clockwise or counterclockwise — either direction works. The target is complete cessation of bleeding. Expect significant pain from the patient; that indicates correct pressure. Check the pulse distal to the tourniquet — it should be absent. If bleeding continues, tighten more.
- Lock the windlass into the retention clip. Secure the windlass strap over the rod and clip. Fasten the Velcro so the rod cannot rotate. Verify the lock is secure.
- Mark the application time. Write the time on the white strip using permanent marker. Format: "T" followed by the time (example: T 14:35). If no marker is available, write on the patient's forehead or tape on their clothing. This information determines the surgical window when they reach a trauma center.
- Monitor the patient and do not remove the tourniquet. Treat for shock — keep the patient warm, have them lie down, elevate legs if no spinal injury. If bleeding continues past the tourniquet, apply a second tourniquet directly above the first. Only medical personnel remove tourniquets.
The most common application failure is stopping short of arterial occlusion. Patients will react to pain from correct tourniquet pressure. That reaction is not a signal to stop tightening — it's confirmation that you're generating real pressure. If the bleeding has not completely stopped, the tourniquet is not tight enough. Keep twisting.
Application mistakes that cost lives
Placing too far from the wound
Two to three inches above the wound is the target — not halfway up the limb. Excessive distance reduces effectiveness and increases the risk of ischemic injury to healthy tissue.
Applying over clothing
Thick fabric prevents the band from generating sufficient pressure against the limb. Cut away or roll up clothing before applying. Trauma shears are in your kit for this reason.
Positioning over a joint
Elbows and knees don't have the flat bone structure needed to generate and hold pressure. Always position on the long bone: upper arm or thigh.
Stopping before arterial occlusion
The most common mistake. The windlass must be tightened until the bleeding stops completely — not until it slows, not until the patient reacts. Partial application is not effective application.
Loosening the tourniquet before EMS arrives
Never loosen or remove a tourniquet once applied. Loosening allows the wound to re-bleed, and the clot that had begun to form is disrupted. Only trauma surgeons remove tourniquets — that happens in the OR, not in the field.
Skipping the time notation
The time determines how long the limb has been without circulation. Surgeons use it to assess whether the tissue is viable. Missing time notation is a gap in the hand-off to definitive care.
Using an improvised tourniquet
Belts, ropes, and cloth strips don't generate sufficient mechanical pressure. They compress soft tissue, cause additional injury, and fail to occlude arterial flow in most cases. The CAT costs $37. That's the cost of having a real option when improvisation won't work.
Counterfeit CAT and SOF-T tourniquets are widely sold online at near-authentic prices. Counterfeit windlass mechanisms fail under load — exactly when arterial pressure is pushing back hardest. Purchase from verified distributors only. The NSN for the CAT Gen 7 is 6515-01-521-7976. If the seller can't provide it, that's a signal.
A tourniquet you've never practiced with is one you won't apply correctly when it counts. Train with what you carry.— ViTAC Field Standard
Where to stage tourniquets
A tourniquet buried in a bag is not accessible. Stage it for a 30-second reach from any position you're likely to be in when the injury happens:
- Vehicle kits: in the passenger compartment, not the trunk. A tourniquet mounted to a door panel or console is reachable after a collision. One in the trunk is not.
- Home trauma station: accessible on a shelf or mounted to a wall — not buried in a cabinet behind seasonal items. The same logic applies as the vehicle: access time determines outcome time.
- Range and training: two tourniquets minimum — one staged on the body in a carrier or pocket, one in the bag. At least one should be reachable with the non-dominant hand.
- Workplace first aid kit: industrial settings with machinery, power tools, or cutting equipment have a documented bleed risk. The tourniquet belongs in the primary kit, not a secondary cabinet.
- Outdoor and backcountry: in a pouch on the outside of the pack — not inside. EMS response in backcountry settings averages 30+ minutes; the gear has to be usable before help arrives.
Every ViTAC IFAK includes a pre-staged CAT Gen 7 in a position accessible within the kit's organization. The staging isn't accidental — it's part of the kit design.

FAQ
How long can a tourniquet stay on before causing permanent damage?
Military and trauma surgery data indicates that tourniquet times up to two hours are generally safe, with risks increasing beyond that threshold. Ischemic injury risk rises significantly past four hours. This is why marking the application time matters — the surgical team uses it to assess limb viability and plan the removal sequence. Get the patient to definitive care as fast as possible. Don't use time limits as a reason to loosen a tourniquet in the field.
Can I apply a CAT tourniquet to myself?
Yes. One-handed self-application is a documented and practiced technique, particularly for upper extremity injuries. The CAT was designed to allow it. The critical point for self-application is to get the band around the arm before blood loss causes incapacitation — act immediately, don't wait to assess whether the bleed will slow on its own.
What's the difference between the CAT Gen 7 and earlier versions?
The Gen 7 updated the windlass design with a wider strap contact point, improved buckle, and clearer time strip. The functional mechanism is the same as earlier iterations, which is why the CoTCCC continued recommending it — not because it changed, but because what worked kept working.
Does tourniquet application require medical training?
No. The TCCC framework is explicitly designed for use by non-medical personnel — soldiers, civilians, and first bystanders. Stop the Bleed certification (free, two hours) covers tourniquet application, wound packing, and basic trauma assessment. The CoTCCC guideline is that anyone present at a traumatic injury should be able to apply the M in MARCH — massive hemorrhage control — without waiting for a medic.
Bottom line
The CAT Gen 7 works. 4,000+ combat applications and an 87%+ correct-application survival rate are not marketing numbers — they're from documented DoD and trauma surgery data on real casualties. The gear is not the gap. The gap is application error: wrong placement, insufficient tightening, skipped time notation.
Train with the specific tourniquet you carry. The mechanism is the same across CoTCCC-approved devices, but the buckle feel, the windlass tension, and the locking sequence are slightly different between models. Muscle memory built on one transfers imperfectly to another. Know your gear, stage it where you can reach it, and train until the eight steps are automatic.
Carry a real tourniquet. Buy from a verified source. Stage it for access. The rest is practice — see ViTAC's IFAK collection for kits built with CoTCCC components pre-staged for rapid deployment.