Top 5 First Aid Mistakes That Could Cost You Your Life
18 min reading time
18 min reading time
Most people who carry a first aid kit have never been tested. Their tourniquet is in the pouch. Their gauze is sealed. Their chest seal is in the wrapper. Everything looks ready.
But having the gear and knowing how to use it correctly are two different things. The mistakes that kill people in trauma situations aren't usually from missing equipment — they're from wrong technique, hesitation, and outdated habits that get drilled in and never corrected.
These are the five most common tactical first aid mistakes. Know them before you need them.
This is the most documented error in prehospital trauma care, and it's been killing people since long before modern tactical medicine formalized the fix.
The mistake: Seeing a wound on the lower leg or forearm and placing the tourniquet just above it. The instinct is logical — put it near the bleed. But in a real emergency, you rarely know where all the bleeding is coming from. A wound on the lower leg may have a second, worse injury higher on the limb. Placing the tourniquet at the obvious site leaves the higher wound uncontrolled.
The second error: Placing the tourniquet over a joint — the elbow, wrist, knee, or ankle. A tourniquet over a joint cannot generate sufficient circumferential pressure to occlude the artery. It will fail.
Step-by-step — tourniquet placement:
| 1 | Identify the injured limb. Don't waste time assessing the wound location — move immediately. |
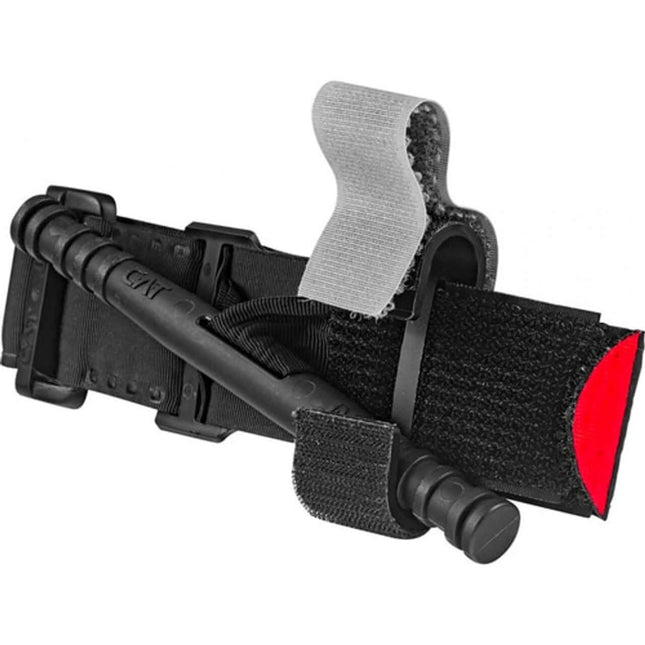
| 2 | Route the tourniquet as HIGH on the limb as possible. Upper arm near the armpit, or upper thigh near the groin. |
| 3 | Thread and pull the band TIGHT — all slack removed before touching the windlass. |
| 4 | Twist the windlass until bleeding stops completely. This requires significant force. A tourniquet that's comfortable is not tight enough. |
| 5 | Lock the windlass and secure the clip. Write the time applied directly on the tourniquet band or the patient. |
| 6 | Reassess. Verify bleeding has stopped. If not: apply a second tourniquet proximal to the first. |
This myth costs lives. The outdated teaching — that you only apply a tourniquet after everything else fails — is not appropriate in a tactical or emergency trauma scenario.
Uncontrolled arterial bleeding from a limb can cause death in three to five minutes. In that window, the time you spend applying pressure, wrapping, adjusting, and reassessing is time the casualty is losing blood. The tourniquet should be your first response to life-threatening extremity hemorrhage — not your last.
The origin of the myth: Older civilian first aid training emphasized minimizing tourniquet use due to concerns about tissue damage and limb loss. Combat medicine has since demonstrated that a properly applied tourniquet — even for extended durations — is overwhelmingly safe and effective. Limb loss from tourniquet complications is rare. Death from delayed application is not.
When to go straight to the tourniquet:
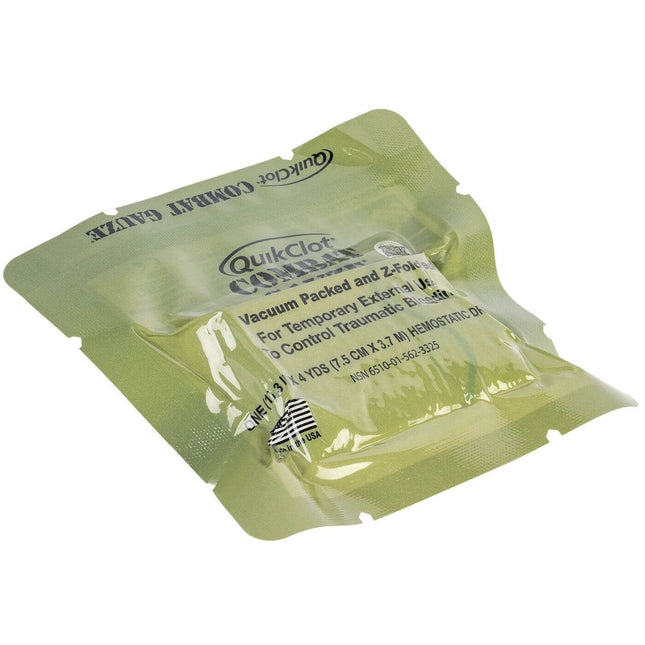
For junctional wounds — the groin, axilla, neck, and areas where a tourniquet cannot be applied — wound packing with hemostatic gauze is the primary hemorrhage control tool. Most people get it wrong in the same way: they apply gauze to the surface of the wound and hold pressure. That is not wound packing.
The mistake: Laying gauze over the opening and pushing down. This creates pressure at the surface but does nothing to stop bleeding at the source deep in the tissue. The gauze absorbs blood — a phenomenon called the wicking effect — without actually stopping the hemorrhage. Casualties can continue to bleed out with gauze in place and responders believing the situation is controlled.
Five-step wound packing protocol (TCCC-aligned):
| 1 | Apply direct pressure immediately to stem flow while you prepare supplies. Use your hand, a knee, anything available. |
| 2 | Get gloved. Protect yourself and the casualty from cross-contamination. |
| 3 | Insert your finger or the leading edge of the gauze into the deepest part of the wound — contact the source of bleeding directly. |
| 4 | Pack tightly from the base up. Feed in gauze continuously. One roll may not be enough — use a second if needed. |
| 5 | Apply firm bimanual pressure for three full minutes. Do not release early, do not check the wound mid-count. |
| 6 | Once bleeding is controlled, apply a pressure bandage (Israeli dressing) over the packed wound to maintain compression. |
A penetrating chest wound that allows air into the pleural cavity creates an open pneumothorax. Left untreated, this collapses the lung on the injured side. What makes it acutely lethal is the next step: tension pneumothorax, where air becomes trapped in the chest cavity with no way to escape, compresses the heart and great vessels, and causes cardiovascular collapse.
The first mistake: Using an unvented (occlusive) chest seal. An unvented seal fully closes the wound — which stops air from entering but also stops it from escaping. If any air is already trapped, the seal accelerates tension pneumothorax. Research and international guidelines now support vented chest seals as the standard for prehospital care. The one-way valve allows air to exit during exhalation while preventing inhalation of outside air.
The second mistake: Applying the seal to a bloody, wet, or sweaty surface. Chest seals fail to adhere when the skin is not dry. A seal that lifts or wrinkles during patient movement becomes non-functional exactly when it's most needed. Blood can also clog the vent mechanism, requiring the responder to clear the valve.
Signs of tension pneumothorax developing after chest seal application:
You've applied the tourniquet. Bleeding is controlled. The casualty is stabilized. You're done, right?
No. The work doesn't stop at application.
The time-marking failure: Every tourniquet applied must have the time of application recorded. When EMS arrives or the casualty reaches a trauma center, clinical decisions — including whether the limb can be salvaged — depend on knowing how long the tourniquet has been in place. A casualty who arrives at a hospital with no time written on their tourniquet creates a dangerous information gap for the receiving team.
The reassessment failure: A tourniquet can shift during patient movement. A wound that appeared controlled may begin re-bleeding. A casualty who was stable can deteriorate. Applying the tourniquet is not the end of your responsibility — it's the beginning of an ongoing monitoring cycle.
Reassessment checklist — post-tourniquet application:
| The Mistake | The Fix |
|---|---|
| Tourniquet placed over a joint or too low on the limb | Place high and tight — upper arm or upper thigh, never over a joint |
| Tourniquet used as a last resort after other measures fail | For life-threatening limb hemorrhage, tourniquet is the first intervention |
| Wound packed at the surface instead of from the base | Pack deeply to the bleeding source; hold firm pressure for 3 full minutes |
| Unvented chest seal applied to a wet or bloody surface | Use vented seal only; dry the skin first; monitor for tension pneumothorax |
| No time marked; tourniquet not reassessed after application | Mark time immediately; reassess every few minutes until EMS handoff |
When someone goes down, most people freeze or move too slowly because they don't have a mental framework. Run this sequence:
This is the most common fear — and it's been largely disproven by modern military medicine. Properly applied tourniquets used for reasonable durations are overwhelmingly safe. The greater risk is from the injury itself. More limbs are lost to delayed or absent tourniquet application than from tourniquet complications.
Current military and trauma guidelines indicate that tourniquet times of up to two hours are generally safe. Beyond two hours, the risk of ischemic injury increases — which is why marking the application time is essential. That information determines urgency at the receiving facility.
Yes. Plain gauze, packed correctly and held with firm direct pressure for three or more minutes, is effective at controlling hemorrhage. The hemostatic agents in products like QuikClot Combat Gauze accelerate clotting, but the mechanism is the same: pressure at the source of bleeding. Technique matters more than the specific gauze type.
A vented chest seal has a one-way valve that allows air to escape from the chest cavity during exhalation while preventing outside air from entering. This prevents the buildup of pressure that causes tension pneumothorax. An unvented (occlusive) seal blocks airflow in both directions — which can accelerate tension pneumothorax if air is already trapped. Vented seals are the current standard for prehospital care.
Bleeding stops completely. That is the only measure that matters. A tourniquet that reduces bleeding is not tight enough — it needs to stop it entirely. Yes, this requires significant force on the windlass, and yes, it is painful for the casualty. Pain is not a reason to under-tighten. Effective hemorrhage control is.
The five mistakes in this post are documented — in military after-action reviews, in prehospital research, and in trauma case studies. They happen to people who have kits, who carry the right gear, and who still get the technique wrong when it matters.
The kit doesn't save the life. The person using it does. Train on your gear, know the correct technique for each intervention, and practice until the right moves are automatic — because under stress, your hands will do what they've been trained to do.

OSHA minimum workplace kits don't include a tourniquet. Here's how to calculate station count, stock each station, and build bleed control coverage in any public...

One kit at the main entrance fails the 90-second coverage rule for most buildings. Here's how to run a coverage audit and calculate the correct...

Arterial hemorrhage kills in 3 minutes. Urban EMS takes 7–10. Every business needs CoTCCC-standard bleed control kits — here's how to select, deploy, and train...

40+ states mandate bleed control kits in schools — but most deployment plans miss classrooms and buses. Here's the placement standard that actually works.

Most of our trauma kits and first aid supplies qualify for HSA and FSA reimbursement. Don't let your benefits expire — invest them in gear that could save a life.


$124.95


$279.99

$37.49 - $139.46


$299.95 $269.95


$139.95 - $169.95

$49.95


$25.99


$164.95

We've been downrange. We know what it costs to be unprepared. ViTAC was built by U.S. Army Special Operations veterans to make sure the people who run toward the threat — and the families who depend on them — have gear that works when everything is on the line.
— ViTAC Solutions Founders | 40+ years combined Special Operations experience