Hemorrhage Control with Compressed Gauze: Life-Saving Wound Packing Techniques
10 min reading time
Hemorrhage control with compressed gauze is a critical life-saving skill for managing severe bleeding in emergency situations. Learn proper wound packing techniques, when to use compressed gauze, application protocols, and why this compact medical supply belongs in every trauma kit and emergency preparedness plan.
Hemorrhage Control with Compressed Gauze: Life-Saving Wound Packing Skills
Hemorrhage control with compressed gauze is one of the most critical life-saving skills you can master for emergency situations. Whether you're an outdoor adventurer, first responder, tactical professional, or prepared civilian, knowing how to properly use compressed gauze to stop severe bleeding can mean the difference between life and death when professional medical help is minutes or hours away.
Severe bleeding from traumatic injuries is the leading cause of preventable death in both combat and civilian trauma scenarios. Compressed gauze provides a compact, portable, and highly effective solution for controlling hemorrhage through wound packing—a technique that applies direct pressure deep within wounds to stop arterial and venous bleeding.
This comprehensive guide covers everything you need to know about hemorrhage control using compressed gauze: what it is, when to use it, proper wound packing techniques, application protocols, and why this essential medical supply belongs in every trauma kit and emergency preparedness plan.
What Is Compressed Gauze?
Compressed gauze (also called z-fold gauze or vacuum-packed gauze) is sterile medical gauze that has been tightly compressed into a compact package, typically measuring just a few inches square. When removed from packaging, it expands to several feet of continuous gauze strip.
Key Characteristics
Compact and Portable
Compression reduces the package size by 80-90%, making it easy to carry in IFAKs, trauma kits, and emergency bags without taking up valuable space.
Sterile Packaging
Individually sealed in vacuum-packed or foil pouches to maintain sterility until use, critical for preventing infection in traumatic wounds.
Continuous Strip
Provides several feet of uninterrupted gauze (typically 3-5 yards) allowing deep wound packing without multiple pieces.
High Absorbency
Absorbs significant amounts of blood and wound exudate while maintaining structural integrity under pressure.
X-Ray Detectable
Many compressed gauze products include radiopaque markers, allowing medical professionals to locate gauze if accidentally left in wounds.
Why Compressed Gauze Is Essential for Hemorrhage Control
Compressed gauze offers critical advantages for managing severe bleeding:
Effective for Deep Wounds
Unlike surface dressings, compressed gauze can be packed deep into wounds to apply direct pressure at the bleeding source—essential for controlling arterial hemorrhage.
Versatile Application
Works for various wound types including gunshot wounds, stab wounds, deep lacerations, traumatic amputations, and blast injuries.
Rapid Deployment
Quick to open and apply in high-stress situations when every second counts.
Space-Efficient
Compressed packaging allows you to carry multiple rolls without excessive bulk or weight.
Cost-Effective
Provides professional-grade hemorrhage control at affordable prices compared to specialized hemostatic dressings.
When to Use Compressed Gauze for Hemorrhage Control
Compressed gauze is indicated for specific bleeding scenarios:
Primary Indications
Deep Penetrating Wounds
Gunshot wounds, stab wounds, or impalement injuries that create deep cavities requiring internal pressure.
Severe Lacerations
Deep cuts with significant tissue damage and active bleeding that direct pressure alone cannot control.
Traumatic Amputations
Partial amputations or mangled extremities with complex bleeding that requires both packing and tourniquet application.
Blast Injuries
Fragmentation wounds with multiple entry points and irregular wound channels.
When NOT to Use Wound Packing
Compressed gauze wound packing is NOT appropriate for:
Superficial wounds controlled by direct pressure alone
Chest wounds with potential pneumothorax (use chest seals instead)
Abdominal evisceration (cover with moist dressing, don't pack)
Eye injuries
Suspected skull fractures or brain injuries
Wound Packing Technique: Step-by-Step Protocol
Proper wound packing technique is critical for effective hemorrhage control:
Step 1: Ensure Scene Safety and PPE
Assess for ongoing threats before approaching
Put on gloves (nitrile or latex) for bloodborne pathogen protection
Use eye protection if available (blood can spray under pressure)
Call for help or direct someone to call 911
Step 2: Expose and Assess the Wound
Remove or cut away clothing to fully visualize the injury
Quickly assess wound depth, size, and bleeding severity
Identify if wound is packable (deep cavity) or requires surface pressure only
Look for multiple entry/exit wounds
Step 3: Apply Initial Direct Pressure
Place gloved hand or gauze pad directly on wound
Apply firm, continuous pressure for 30-60 seconds
If bleeding slows significantly, continue pressure without packing
If bleeding continues despite pressure, proceed with wound packing
Step 4: Prepare Compressed Gauze
Open compressed gauze package (tear or cut open)
Remove gauze while maintaining sterility (don't touch the gauze itself)
Allow gauze to partially expand
Identify the leading end for insertion
Step 5: Pack the Wound
Critical Technique Points:
Insert gauze deep into wound: Push gauze to the bottom of the wound cavity using your fingers or a gloved hand
Pack tightly: Use firm pressure to compress gauze into the wound—it should feel tight and resistant
Fill completely: Continue packing until the wound is completely filled with gauze
Pack in layers: For very deep wounds, pack in a layered or accordion pattern
Leave tail exposed: Keep 6-12 inches of gauze outside the wound for later removal by medical professionals
Important: Wound packing should be uncomfortable for the patient—this indicates adequate pressure. Don't pack loosely or the bleeding won't stop.
Step 6: Apply Direct Pressure Over Packed Wound
Place additional gauze pad or dressing over the packed wound
Apply firm, continuous pressure directly over the wound for minimum 3 minutes
Use your full body weight if necessary (lean into the pressure)
Do NOT lift pressure to "check" if bleeding stopped—maintain continuous pressure
If bleeding soaks through, add more gauze on top and increase pressure (don't remove original packing)
Step 7: Secure the Dressing
Once bleeding is controlled, secure dressing with pressure bandage or conforming gauze wrap
Wrap firmly to maintain pressure on the wound
Ensure wrapping doesn't cut off circulation to the limb
Monitor for continued bleeding through the dressing
Step 8: Monitor and Treat for Shock
Continuously monitor patient's condition
Keep patient warm (prevent hypothermia)
Elevate legs if no spinal injury suspected
Provide reassurance and keep patient calm
Do NOT remove packed gauze—only medical professionals should remove it
Prepare for rapid evacuation to medical facility
Common Wound Packing Mistakes to Avoid
❌ Packing Too Loosely
The most common error. Gauze must be packed tightly with significant pressure to compress blood vessels and stop bleeding. Loose packing is ineffective.
❌ Not Packing Deep Enough
Gauze must reach the bottom of the wound cavity where bleeding originates. Surface packing won't control deep hemorrhage.
❌ Insufficient Direct Pressure After Packing
Packing alone isn't enough—you must apply firm pressure over the packed wound for several minutes to achieve hemostasis.
❌ Checking Too Soon
Lifting pressure to "see if it worked" disrupts clot formation. Maintain continuous pressure for at least 3 minutes before assessing.
❌ Removing Packed Gauze
Never remove packed gauze in the field. Removal can restart bleeding and should only be done by medical professionals in controlled settings.
❌ Using Non-Sterile Materials
Always use sterile compressed gauze when available. Infection risk is secondary to bleeding control, but sterile materials reduce complications.
Compressed Gauze vs. Hemostatic Gauze
Understanding the difference helps you choose appropriate supplies:
Standard Compressed Gauze
Mechanism: Provides physical pressure and absorbs blood Advantages: Affordable, widely available, no special storage requirements Best for: Most traumatic bleeding scenarios, budget-conscious kits
Hemostatic Gauze (Combat Gauze, QuikClot)
Mechanism: Contains clotting agents (kaolin, chitosan) that accelerate coagulation Advantages: Faster hemostasis, effective for severe arterial bleeding Best for: Life-threatening hemorrhage, tactical/combat situations, when every second counts
Both require proper wound packing technique—hemostatic agents enhance but don't replace correct application.
Hemorrhage Control in Different Environments
Wilderness and Remote Areas
Compressed gauze is essential for backcountry emergencies where evacuation may take hours. Lightweight and compact design makes it ideal for hiking first aid kits.
Workplace Safety
High-risk industries (construction, manufacturing, logging, mining) should stock compressed gauze in workplace first aid stations for traumatic injury response.
Tactical and Law Enforcement
Essential component of IFAKs for officers and tactical teams who may face penetrating trauma from firearms or edged weapons.
Vehicle Emergency Kits
Motor vehicle accidents can cause severe traumatic injuries. Compressed gauze in vehicle kits enables immediate hemorrhage control before EMS arrival.
Home Preparedness
Accidents involving power tools, kitchen knives, or other sharp objects can cause severe bleeding requiring wound packing.
All wounds requiring packing need professional medical evaluation:
Wound packing is a temporary measure—evacuation to hospital is mandatory
Deep penetrating wounds may have internal injuries not visible externally
Risk of infection increases with time—antibiotics and wound cleaning needed
Packed gauze must be professionally removed and wound properly closed
Blood loss may require transfusion even if bleeding is controlled
Call 911 immediately when using wound packing techniques. Continue hemorrhage control while awaiting EMS.
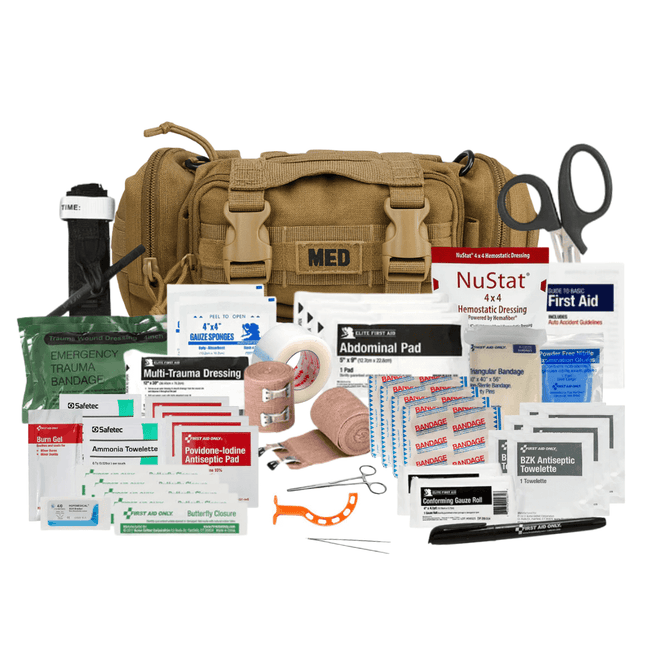
ViTAC Solutions: Professional Hemorrhage Control Equipment
At ViTAC Solutions, we provide professional-grade hemorrhage control supplies including compressed gauze, hemostatic agents, tourniquets, and complete trauma kits.
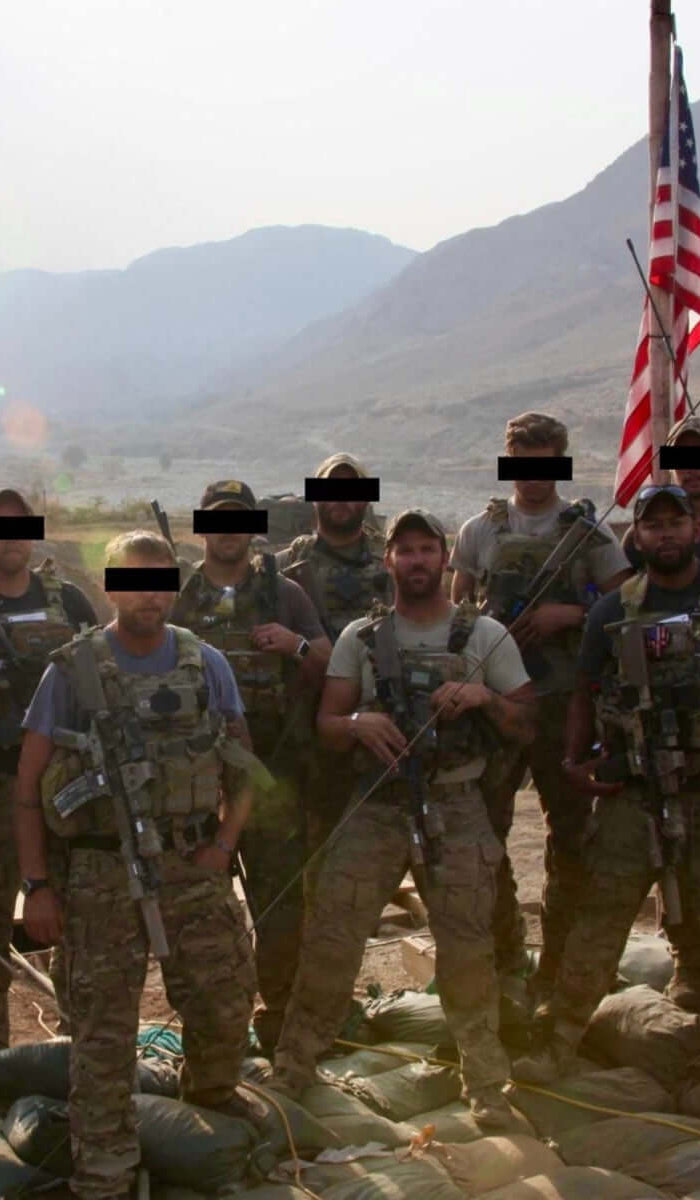
Our kits are curated by U.S. Army Green Berets with combat medical experience, ensuring you have the right tools and quantities for effective hemorrhage control in any emergency.
Hemorrhage control with compressed gauze is a learnable skill that can save lives in the critical minutes before professional medical help arrives. Combined with proper training and quality supplies, you'll be prepared to respond effectively when severe bleeding emergencies occur.
Train. Prepare. Be ready to stop the bleed.
ViTAC Solutions – Professional-grade trauma equipment built by veterans, trusted by those who refuse to leave survival to chance. Because when severe bleeding occurs, proper hemorrhage control techniques and quality compressed gauze can mean the difference between life and death.
In Stock. Ready to Ship.
Domestic Shipping (USA - Lower 48 Only) Orders are processed within 24 hours and typically ship within 1–2 business days. Once shipped, delivery takes an estimated 3–7 days, with most orders arriving in just 5 days. Please Note: We currently do not ship to Alaska, Hawaii, or international destinations. Questions? Contact us anytime at support@vitacsolutions.com or call 307-202-8426.
Are you making the right choice when buying IFAK trauma kits? This post highlights the crucial differences between budget and quality options, focusing on components...
5 Things You Need to Know Before You Buy a First Aid Kit
Before buying a first aid kit, ensure it suits your specific needs, contains essential trauma supplies, and is backed by reliable support. Discover key factors...
Discover essential items every Car Trauma Kit Essentials should include to effectively control severe bleeding after an accident. Learn the importance of training and how...
Community Preparedness: How Public Safety Leaders Build Resilient Neighborhoods
Community preparedness starts with strong leadership. This comprehensive guide empowers law enforcement officers, veterans, first responders, and civic leaders to organize emergency training, build volunteer...
Trusted by Law Enforcement & Tactical Professionals
Our Mission.
We've been downrange. We know what it costs to be unprepared. ViTAC was built by U.S. Army Special Operations veterans to make sure the people who run toward the threat — and the families who depend on them — have gear that works when everything is on the line.
— ViTAC Solutions Founders | 40+ years combined Special Operations experience
Most of our trauma kits and first aid supplies qualify for HSA and FSA reimbursement. Don't let your benefits expire — invest them in gear that could save a life.
What are you preparing for? On-duty response, family preparedness, outdoor adventure... Answer 5 quick questions and we'll match you with the right gear.
Hello thank you for putting out a affordable kit we were spending a lot of money on MYMEDIC kits but I think you changed my mind
Hi Joey, thank you so much for taking the time to leave us a review. We're thrilled to hear that our kit has made a positive impression on you. We strive to provide high-quality, affordable options for our customers, and we're happy to have changed your mind about other brands. Stay safe out there!