Why a Tourniquet Belongs in Every Camping and Hiking Kit
22 min reading time
A tourniquet for camping hiking is essential in emergencies. This article explains its importance, application, and common mistakes.
Heading out into the wild for camping or hiking is awesome. You get away from it all, breathe fresh air, and see some cool stuff. But let's be real, things can go wrong out there. Accidents happen, and sometimes they're pretty serious, like bad bleeding. It’s not something most people think about when packing their bags, but it’s super important. Having the right gear, and knowing how to use it, can make a huge difference. One item that really should be in every camping and hiking kit is a tourniquet for camping hiking. It sounds intense, but it’s a simple tool that can save a life when every second counts.
Key Takeaways
Severe bleeding can be deadly in minutes, often before help arrives, making quick action vital.
A proper tourniquet, like the CAT, is designed for fast, one-handed application and is far more reliable than improvised methods.
Knowing when and how to correctly apply a tourniquet, including placement and tightening, is critical for its effectiveness.
Common errors like not tightening enough, loosening too soon, or forgetting to mark the time can have serious consequences.
Practicing with your tourniquet and storing it accessibly in your kit are key steps to being prepared for emergencies.
Understanding the Urgency of Severe Bleeding
When you're out in the backcountry, miles from any help, a serious injury can turn into a life-or-death situation incredibly fast. Severe bleeding, especially from an arm or leg, is one of those emergencies that demands immediate action. We're not talking about a little scrape here; we're talking about blood loss that can overwhelm the body before medical professionals can even get to you. In under five minutes, a catastrophic bleed can be fatal. That's a terrifyingly short amount of time, and it's why knowing what to do is so important.
The Critical Five-Minute Window
Think about it: emergency services often take longer than five minutes to arrive, especially if you're deep in the woods. This means that in many cases, the person who is first on the scene – that's you – is the only one who can stop the bleeding in those first few minutes. It’s a heavy responsibility, but it’s also where preparedness makes all the difference. Understanding this narrow window helps us appreciate why having the right tools and knowledge is non-negotiable for anyone venturing outdoors.
Preventable Deaths in Trauma Situations
It's a grim fact, but a lot of deaths from traumatic injuries happen because the bleeding just couldn't be stopped in time. Studies show that a significant percentage of these deaths could have been avoided if bleeding control measures were applied quickly and correctly. This isn't just about military combat; it happens in car accidents, industrial accidents, and yes, even during outdoor activities. The ability to manage severe hemorrhage is a skill that directly impacts survival rates.
Your Role as the First Responder
In any emergency, you are the first responder. Before paramedics arrive, before a helicopter lands, you are the one on the ground making the critical difference. Your actions in those initial moments can literally save a life. This is why carrying appropriate first aid supplies, like those found in a good outdoor first-aid kit, and knowing how to use them is so vital. It’s about being ready to step up when it matters most, even if you're not a medical professional. You are the first line of defense, and that's a powerful position to be in when facing a life-threatening bleed. Wilderness first aid techniques focus on these immediate actions.
The reality of severe bleeding is that it doesn't wait for convenient moments. It strikes suddenly and demands an immediate, effective response. Being prepared means having the knowledge and equipment to act decisively, turning a potentially tragic outcome into a survivable one.
Essential Components of a Camping First Aid Kit
Alright, so you're heading out into the wild, which is awesome. But let's talk about what you really need in your pack besides snacks and a tent. A solid first-aid kit isn't just a suggestion; it's pretty much non-negotiable. Think of it as your personal, portable emergency room, ready for whatever the woods decide to throw at you.
Core Medical Supplies for Wilderness Injuries
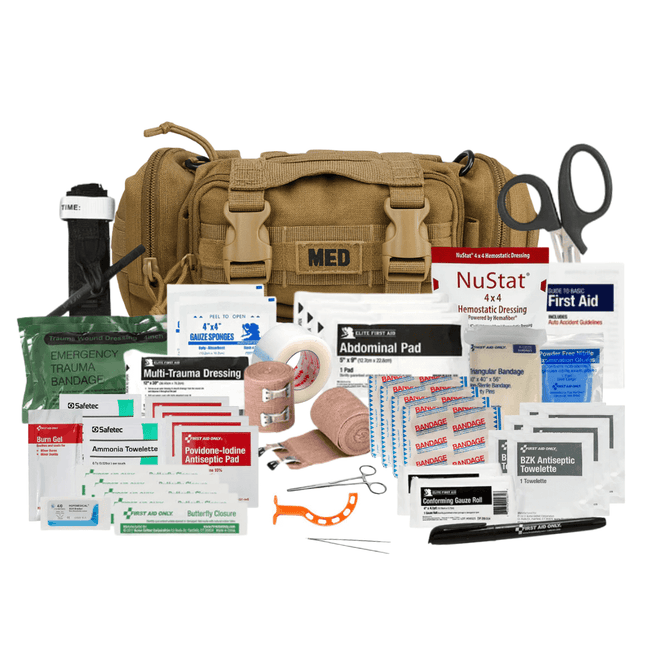
When you're miles from anywhere, even a small cut can turn into a big problem if you're not ready. Your kit needs to handle the basics, and then some. We're talking about keeping wounds clean and stopping bleeding. You'll want a good assortment of bandages, from tiny ones for blisters to larger ones for more serious scrapes. Sterile gauze pads are a must, in different sizes, along with medical tape that actually sticks, even if it gets a little damp. Don't forget antiseptic wipes to clean things up before you bandage them, and antibiotic ointment to help prevent infection. For those deeper cuts, butterfly closures can be a lifesaver, helping to pull the edges of the skin together.
Here’s a quick rundown of what to pack for wound care:
Sterile gauze pads (2x2 and 4x4 inches)
Assorted adhesive bandages
Waterproof medical tape
Antiseptic wipes
Antibiotic ointment
Butterfly closures
Hemostatic gauze (for serious bleeding)
Beyond cuts, think about insect bites and allergic reactions. A few antihistamine tablets and some hydrocortisone cream can make a world of difference. If you or someone in your group has known severe allergies, an epinephrine auto-injector is absolutely critical. You'll also want tweezers for pulling out splinters or ticks.
Trauma and Advanced Medical Equipment
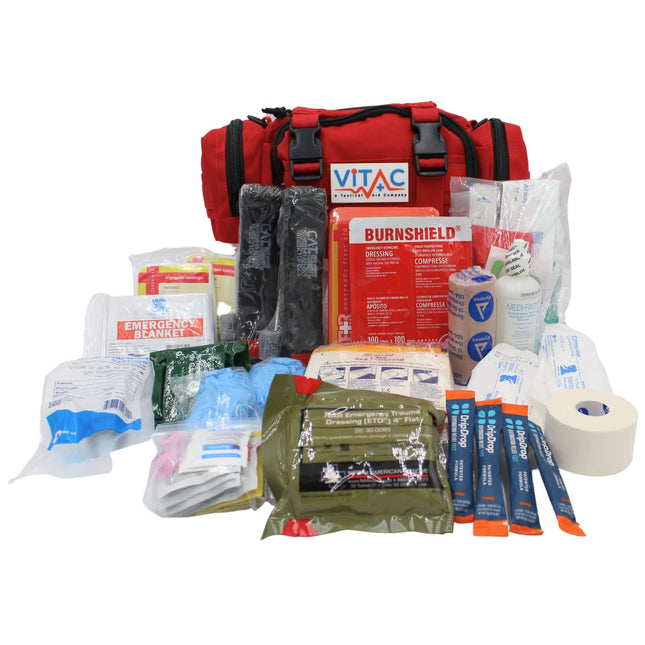
Now, let's get a bit more serious. While basic supplies handle everyday bumps and scrapes, you need to be ready for bigger issues. This means packing items that can manage significant trauma. Pressure dressings are key for controlling heavy bleeding. If someone breaks a bone, SAM splints are incredibly useful for stabilizing the limb. For more severe chest injuries, chest seals can be important. And, of course, there's the tourniquet, which we'll get to later, but it's a vital piece of equipment for life-threatening extremity bleeding. Having these advanced items means you can provide more effective care until professional help arrives. Remember, knowing how to use these items is just as important as having them.
Addressing Environmental Hazards and Burns
Camping isn't just about injuries from falls or sharp objects; the environment itself can pose risks. Extreme heat or cold can lead to heatstroke or hypothermia. While a full hypothermia kit might be too much for a day hike, having an emergency blanket is a good idea. Burns are also a common concern, whether from a campfire or a portable stove. You should pack specialized burn dressings. These are different from regular bandages; they help cool the burn and protect it from infection. For minor burns, a simple burn gel and a non-adherent dressing will do. For more serious ones, you need sterile coverage that keeps the wound moist.
Being prepared for the unexpected is the name of the game when you're out in nature. Your first-aid kit is your first line of defense, and it needs to be more than just a few band-aids. Think about the specific risks of where you're going and what you'll be doing. A well-stocked kit, combined with some basic first-aid knowledge, can make a huge difference in an emergency situation.
Don't forget about things like a compass and map, or a GPS device, because getting lost is a real possibility. An emergency whistle can be heard for a long way if you need to signal for help. Having a satellite communicator or a personal locator beacon is a smart move for remote areas where cell service is non-existent. These items, along with your medical supplies, form the backbone of your preparedness. You can find a good starting point for camping first aid supplies online or at outdoor gear stores. And remember, practice makes perfect. Try using some of the items in your kit before you actually need them. It sounds silly, but it really helps when you're stressed out.
The Combat Application Tourniquet: Design and Function
Understanding the Windlass System
The Combat Application Tourniquet, often called the CAT, has a pretty clever design that makes it work. At its heart is the windlass system. Think of it like a tiny winch. You have a rod, the windlass, that you turn. As you turn it, it tightens a strap around the limb. This tightening is what stops the blood flow. The mechanical advantage here means you can get a lot of pressure, enough to shut off an artery, even if you're only using one hand. This is a big deal when you're the one who's hurt or if you're trying to help someone else quickly.
Features for Rapid Application
What makes the CAT so popular, especially for situations where you need to act fast, are its user-friendly features. It uses a special buckle that lets you thread the strap through and pull it really tight. Then, a strong Velcro strap holds it in place. No complicated knots needed. Once it's snug, the windlass locks into a clip, so it doesn't loosen up on its own. This is super important because you need that constant pressure. It's designed to be applied with one hand, which is a lifesaver if you're injured yourself or dealing with multiple people needing help. You can find these reliable tools for hemorrhage control.
The Importance of the Time Strip
One small but vital part of the CAT tourniquet is the time strip. It's usually a white area on the strap. You're supposed to write the exact time you applied the tourniquet on it. Why? Because medical professionals need to know how long it's been on. This information helps them figure out the best way to treat the injury and manage potential issues like tissue damage. It’s a simple step, but it makes a huge difference for the folks taking over care.
Improvised tourniquets, like using a belt or a piece of rope, are generally not recommended. They often don't create enough pressure to stop severe arterial bleeding and can even cause more harm to the limb.
When and How to Apply a Tourniquet for Camping Hiking
Okay, so you're out in the wilderness, miles from anywhere, and someone gets seriously hurt. We're talking about a limb injury where blood is just gushing out, and no amount of pressure seems to be slowing it down. This is where knowing when and how to use a tourniquet becomes super important. It's not something you want to figure out for the first time when you're stressed and dealing with a real emergency.
Indications for Tourniquet Application
So, when is it time to actually reach for that tourniquet? It's not for every little cut or scrape, obviously. You're looking at situations where the bleeding is severe and life-threatening, and you just can't get it under control with direct pressure alone. Think about a deep gash on an arm or leg, or maybe a partial amputation. If the blood is bright red and spurting, that's a big red flag for arterial bleeding, and that's a situation where a tourniquet might be your best bet. It's also a consideration if you're in an unsafe spot and can't stay put to apply pressure for a long time.
Here are the main reasons to consider using one:
Severe Limb Bleeding: When direct pressure isn't enough to stop blood loss from an arm or leg.
Arterial Bleeding: Characterized by bright red, spurting blood.
Amputation: Partial or complete loss of a limb.
Unsafe Environments: When you need to move quickly and can't maintain pressure.
Remember, tourniquets are for extremities only – arms and legs. They won't help with bleeding from your head, neck, or torso. Trying to use one in those areas can actually make things worse.
Proper Tourniquet Placement Techniques
Getting the placement right is key. You don't just slap it on anywhere. The general rule is to place it about 2 to 3 inches above the wound, meaning between the injury and the person's heart. You want it on bare skin if possible, so cut away clothing if you have to. And definitely avoid putting it directly over a joint like an elbow or knee, because it won't work as well there. If you can't tell exactly where the bleeding started, or if there are multiple wounds, just go high and tight on the limb – that means as close to the torso as you can get it.
Location: 2-3 inches above the wound, on the limb, not over a joint.
Skin Contact: Apply directly to skin if possible; cut clothing away.
General Rule: If unsure, place it high on the limb, near the armpit or groin.
Step-by-Step Application Protocol
Alright, let's break down how to actually put it on. It's a process, and you need to be methodical.
Safety First: Make sure the area is safe for you. Put on gloves if you have them. Call for help or have someone else do it.
Find the Bleed: Quickly locate the source of the severe bleeding on the limb.
Position the Tourniquet: Place it 2-3 inches above the wound, on bare skin, and not over a joint.
Tighten the Strap: Thread the band through the buckle and pull it as snug as you can around the limb. It should be tight, but you're not done yet.
Twist the Windlass: This is the part that stops the bleeding. Keep twisting the rod until the bleeding completely stops. It's going to hurt the person, and that's actually a good sign that you're applying enough pressure. Check that you can't feel a pulse below the tourniquet.
Secure the Windlass: Lock the rod into its clip so it doesn't unwind. Make sure it's secure.
Mark the Time: This is super important. Write the time you applied the tourniquet directly on the time strip with a marker. If you don't have a marker, write it on their forehead or clothing. This tells the medical folks when it went on, which helps them manage care and avoid complications. You can use a format like "T 14:35".
Monitor: Keep an eye on the person. Don't loosen the tourniquet. If bleeding continues, you might need to apply a second one right above the first. Keep them warm and try to keep them calm.
Using a proper tourniquet like the CAT is way more reliable than trying to improvise with something like a belt. While a belt might seem like a good idea in a pinch, they often don't provide enough consistent pressure and can even cause more damage. Stick to the real deal if you can; it's designed for this exact purpose and is much more likely to be effective in stopping that dangerous bleeding. For more on proper application, check out resources on tourniquet use.
Common Mistakes to Avoid with Tourniquets
Look, nobody wants to mess up when someone's life is on the line. But when it comes to using a tourniquet, a small mistake can have big consequences. It's not like forgetting to pack an extra pair of socks; this is serious business. So, let's talk about the common slip-ups people make and how to steer clear of them.
Ensuring Sufficient Tightness
This is probably the biggest one. People get scared they're hurting the person, or they just don't twist that windlass rod enough. If the bleeding doesn't stop completely, it's not tight enough. Period. You need to keep twisting until that bright red arterial blood is gone. Expect pain – that's a sign you're doing it right. You're cutting off blood flow to stop a life-threatening bleed, and that's going to hurt. Don't be shy with it; just keep going until the flow stops. Remember, a loose tourniquet is almost as bad as no tourniquet at all.
The Danger of Loosening Prematurely
Once that tourniquet is on and the bleeding has stopped, you absolutely do NOT loosen it. I repeat: do not loosen it. This isn't a temporary fix you can take off when you feel like it. Loosening it can cause the person to bleed out rapidly again and can also lead to a dangerous drop in blood pressure, potentially causing shock. Leave it on. Only trained medical professionals should remove a tourniquet, and they'll know when and how to do it safely. This is why marking the time is so important.
The Necessity of Marking Application Time
Seriously, don't skip this step. Grab a marker and write the time you applied the tourniquet directly on the time strip of the device. If you don't have a marker, write it on their forehead or even a piece of clothing. Use a clear format like "T 14:35". This information is gold for the paramedics or doctors who take over. It helps them figure out how long the limb has been without blood flow, which is key for managing potential complications and deciding on the next steps for treatment. Forgetting this can really mess things up for the medical team.
Why Improvised Devices Fail
I get it, sometimes you don't have a proper tourniquet handy. Maybe you're deep in the backcountry and only have a belt or a bandana. But here's the deal: improvised devices are incredibly unreliable. They often can't generate the consistent, high pressure needed to stop arterial bleeding. You might end up just squeezing the limb, causing more pain and damage without actually stopping the bleed. Worse, they can sometimes cut into the tissue without occluding the artery. Always, always carry a purpose-built tourniquet, like the CAT, in your first aid kit. They're designed for this exact situation and are far more effective and safer than anything you can cobble together in a pinch.
Integrating Tourniquets into Your Preparedness Plan
So, you've got a tourniquet, you know how to use it (or you're practicing!), but where does it actually live in your gear? It’s not much good if it’s buried at the bottom of your pack under a pile of snacks and extra socks. Think about accessibility. The faster you can get to it, the faster you can use it.
Where to Store Tourniquets for Accessibility
Having a tourniquet is one thing, but being able to grab it instantly in a panic is another. Here’s where to keep them:
Your main camping pack: Keep it in an easily accessible pocket, maybe the top lid or a side pouch. Not stuffed deep inside.
Your day pack or hip belt: If you're doing shorter hikes from a base camp, a smaller pack or even a dedicated pouch on your hip belt can be a lifesaver.
Your vehicle: If you drive to trailheads, keep one in the glove compartment or a readily available spot in the passenger area, not lost in the trunk.
Home first aid kit: Don't forget about emergencies closer to home. A severe bleed can happen anywhere.
The Value of Practice and Training
Look, reading about tourniquets is one thing, but actually applying one, especially under stress, is totally different. You need to practice. Get a training tourniquet – they’re inexpensive – and get comfortable with the motions. Practice applying it to yourself (it’s doable with some contortions!) and to a friend. Knowing the steps cold means you won't be fumbling when it really counts. Remember, the goal is to stop the bleeding fast, and muscle memory from practice makes that possible. It’s about building confidence so you can act decisively. You can find great resources online for proper tourniquet application techniques.
Tourniquets for Camping Hiking: A Lifesaving Addition
Adding a tourniquet to your kit isn't about being overly dramatic; it's about being prepared for the unexpected. Severe bleeding from a limb injury can happen from a slip on a rocky trail, a mishap with a camp knife, or a fall. While direct pressure is always the first step, some injuries are just too severe for it alone. Having a proper, commercially made tourniquet means you have a tool that's designed to work when seconds are ticking away. It’s a small item that takes up minimal space but can make a world of difference. Think of it as part of your overall wilderness first aid kit – a critical piece for managing serious trauma.
When you're miles from anywhere, help isn't just a phone call away. You are the first responder. Having the right tools and knowing how to use them is what separates a minor incident from a tragedy. A tourniquet is one of those tools.
Don't Get Caught Unprepared
Look, we all head out into the woods for a good time, right? Whether it's a day hike or a week of camping, the last thing anyone wants to think about is a serious injury. But stuff happens. A slip on a rock, a slip of a knife while prepping dinner – it can all lead to some pretty nasty bleeding. Having a proper tourniquet, like a CAT, in your pack isn't about being a doomsayer; it's about being smart. It's a small item that takes up hardly any space, but it can literally save a life when seconds count and help is far away. So, next time you're packing your gear, make sure a tourniquet is on that list. You might never need it, and that's the best-case scenario. But if you do, you'll be incredibly glad you brought it along.
Frequently Asked Questions
Why is severe bleeding so dangerous, especially in the outdoors?
Severe bleeding is super dangerous because you can lose too much blood very quickly. In fact, someone can die from losing a lot of blood in just five minutes, sometimes even before help can get to them. This is especially risky when you're camping or hiking because help might be far away.
What's the main reason a tourniquet is important for a camping kit?
A tourniquet is like a special belt that can stop life-threatening bleeding from an arm or leg. In the wilderness, where getting medical help can take a long time, having a tourniquet can be the only thing that saves someone's life if they have a really bad cut or injury.
When should I actually use a tourniquet?
You should use a tourniquet only for serious bleeding from an arm or leg that you can't stop by pressing on it. This means if the blood is bright red and spurting out, or if a limb is partly or completely cut off. It's not for small cuts or bleeding from your head or body.
How do I put on a tourniquet correctly?
First, make sure the area is safe. Then, place the tourniquet 2 to 3 inches above the wound, but not over a joint like your knee or elbow. Pull the band really tight around the limb, and then twist the stick (called a windlass) until the bleeding completely stops. It needs to be super tight to work!
What are the biggest mistakes people make with tourniquets?
The most common mistake is not making it tight enough. If the bleeding doesn't stop, keep twisting! Another big mistake is loosening it before a doctor says it's okay, which can cause more bleeding. Also, never use things like belts or scarves; they don't work well and can cause more harm. Always write down the time you put it on!
Besides a tourniquet, what else should be in my camping first aid kit for serious injuries?
For serious injuries, your kit should also have things like pressure bandages to help stop bleeding, sterile pads and tape for cleaning and covering wounds, and maybe even chest seals if there's a risk of chest injuries. Knowing how to use everything is just as important as having it.
In Stock
Domestic Shipping (USA - Lower 48 Only) Orders are processed within 24 hours and typically ship within 1–2 business days. Once shipped, delivery takes an estimated 3–7 days, with most orders arriving in just 5 days. Please Note: We currently do not ship to Alaska, Hawaii, or international destinations. Questions? Contact us anytime at support@vitacsolutions.com or call 307-202-8426.
In Stock
Domestic Shipping (USA - Lower 48 Only) Orders are processed within 24 hours and typically ship within 1–2 business days. Once shipped, delivery takes an estimated 3–7 days, with most orders arriving in just 5 days. Please Note: We currently do not ship to Alaska, Hawaii, or international destinations. Questions? Contact us anytime at support@vitacsolutions.com or call 307-202-8426.
In Stock
Domestic Shipping (USA - Lower 48 Only) Orders are processed within 24 hours and typically ship within 1–2 business days. Once shipped, delivery takes an estimated 3–7 days, with most orders arriving in just 5 days. Please Note: We currently do not ship to Alaska, Hawaii, or international destinations. Questions? Contact us anytime at support@vitacsolutions.com or call 307-202-8426.
In Stock
Domestic Shipping (USA - Lower 48 Only) Orders are processed within 24 hours and typically ship within 1–2 business days. Once shipped, delivery takes an estimated 3–7 days, with most orders arriving in just 5 days. Please Note: We currently do not ship to Alaska, Hawaii, or international destinations. Questions? Contact us anytime at support@vitacsolutions.com or call 307-202-8426.
What are you preparing for? On-duty response, family preparedness, outdoor adventure... Answer 5 quick questions and we'll match you with the right gear.
We've been downrange. We know what it costs to be unprepared. ViTAC was built by U.S. Army Special Operations veterans to make sure the people who run toward the threat — and the families who depend on them — have gear that works when everything is on the line.
— ViTAC Solutions Founders | 40+ years combined Special Operations experience
Most of our trauma kits and first aid supplies qualify for HSA and FSA reimbursement. Don't let your benefits expire — invest them in gear that could save a life.
Good quality products. The free items were also nice. Great med kit for alot of travel situations
Thank you for the 5-star review. We’re glad the med kit and added items delivered value and that it’s serving you well for travel. Stay prepared and safe out there.
The item was as promised. Everything in the kit was high-quality and I’m pleased with that. The only problem I have is I’m not sure it’s worth the cost. I found all of the contents individually for significantly less money. The only thing I didn’t find on my own was the pouch everything came in and that was a perfect fit so I would give it an A plus on quality, but a C on value.
Thank you for the honest feedback. We’re glad the kit quality and pouch met the mark. We understand your point on value, our pricing reflects not only the components, but careful sourcing, organization, and readiness in one dependable setup. We appreciate your support.